xctf的一血机器人播报,内含源码。
基础知识
初始化bot
首先需要创建一个机器人,在这个网站注册一个账号,之后在应用这里注册一个机器人
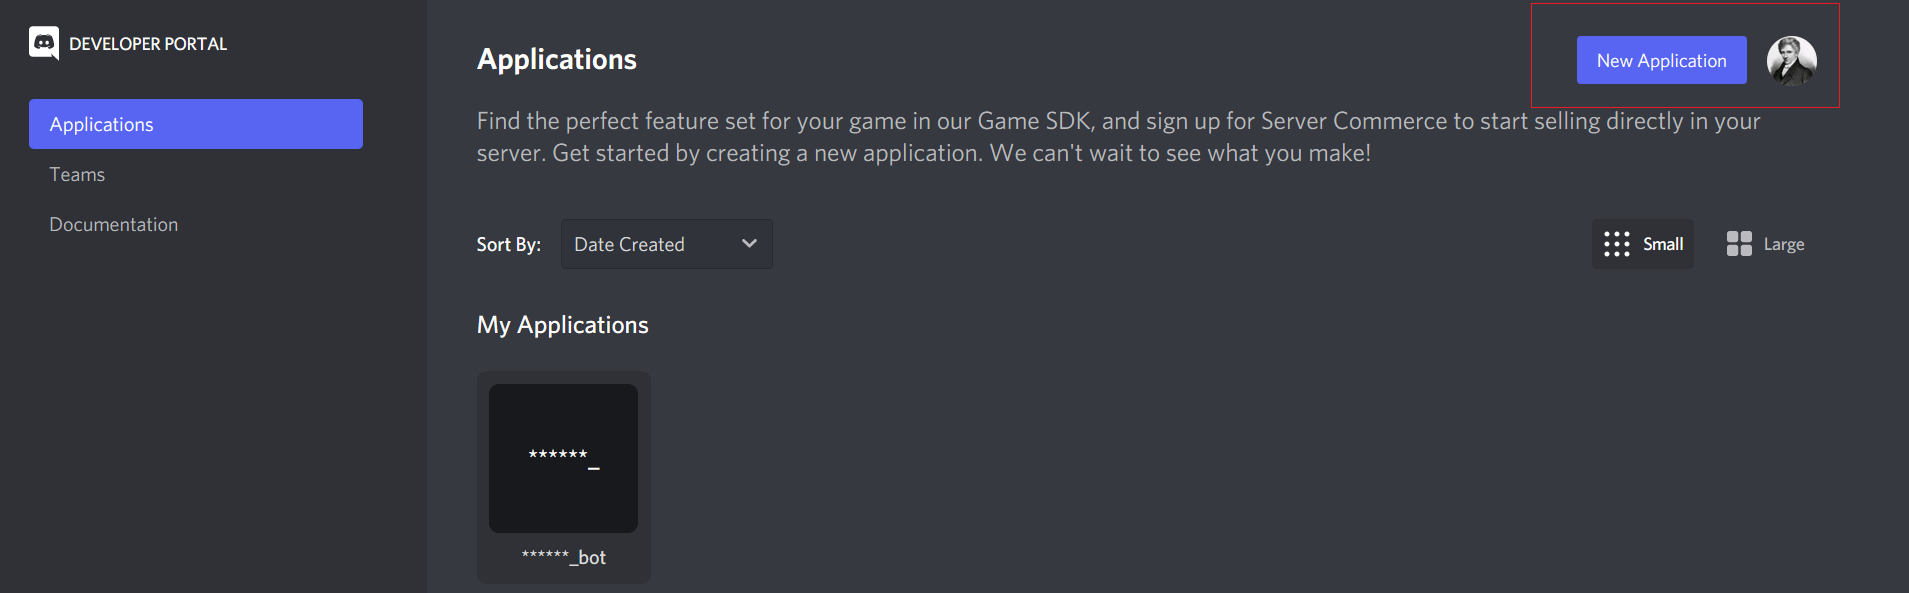
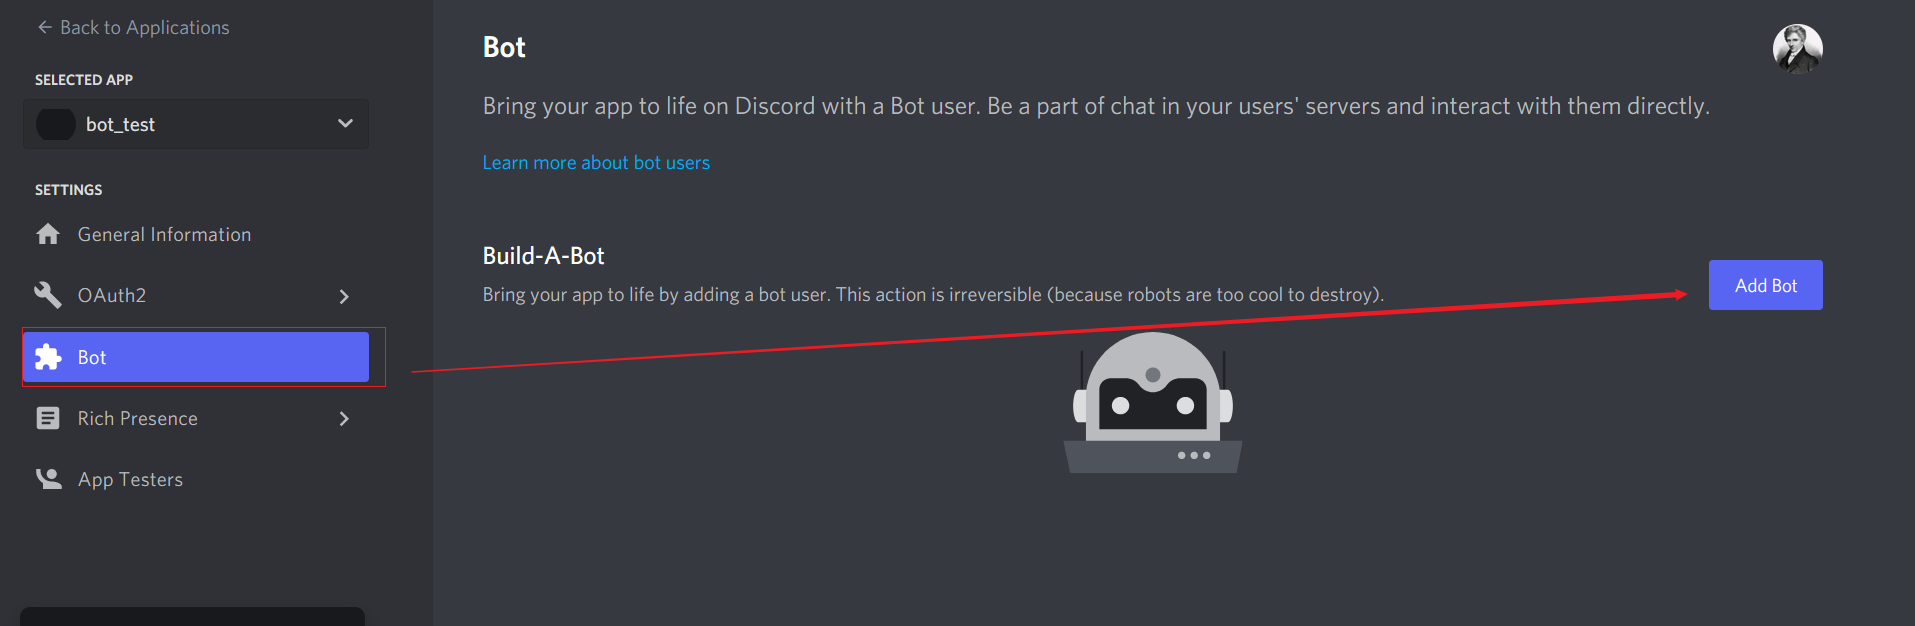
我这里命名为bot_test。点开之后,点击左边的bot,点击add_bot
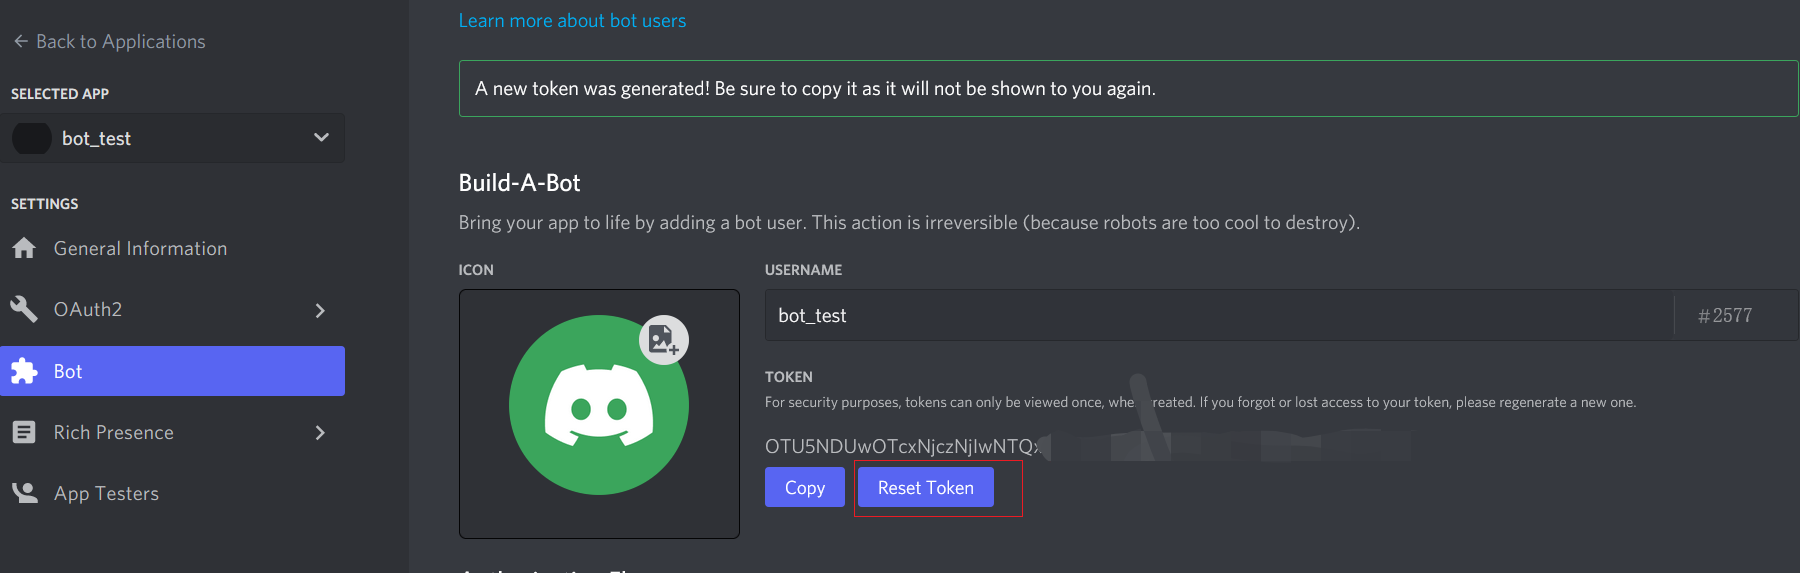
点击生成一个token。如下图。这个token是在本地控制机器人的唯一方式。因此千万不能泄露。
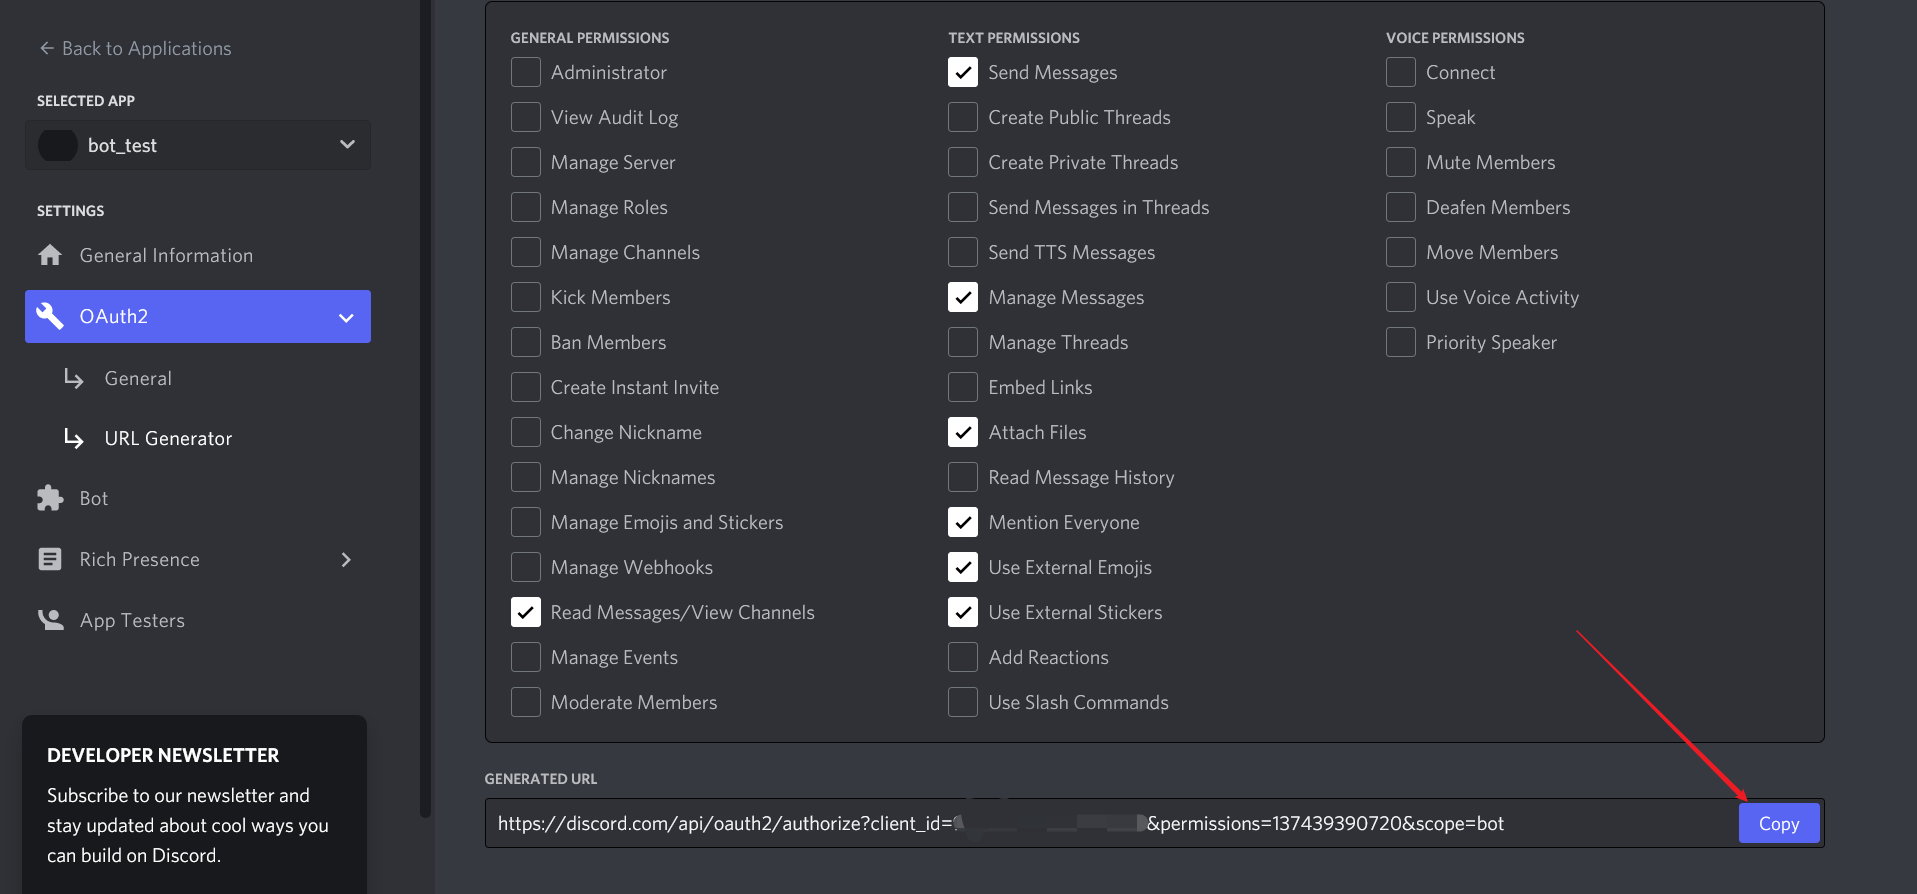
之后点击左边的OAUTH2。选择下面的选项。这里的选项是bot的权限。按照自己的需要添加就行。
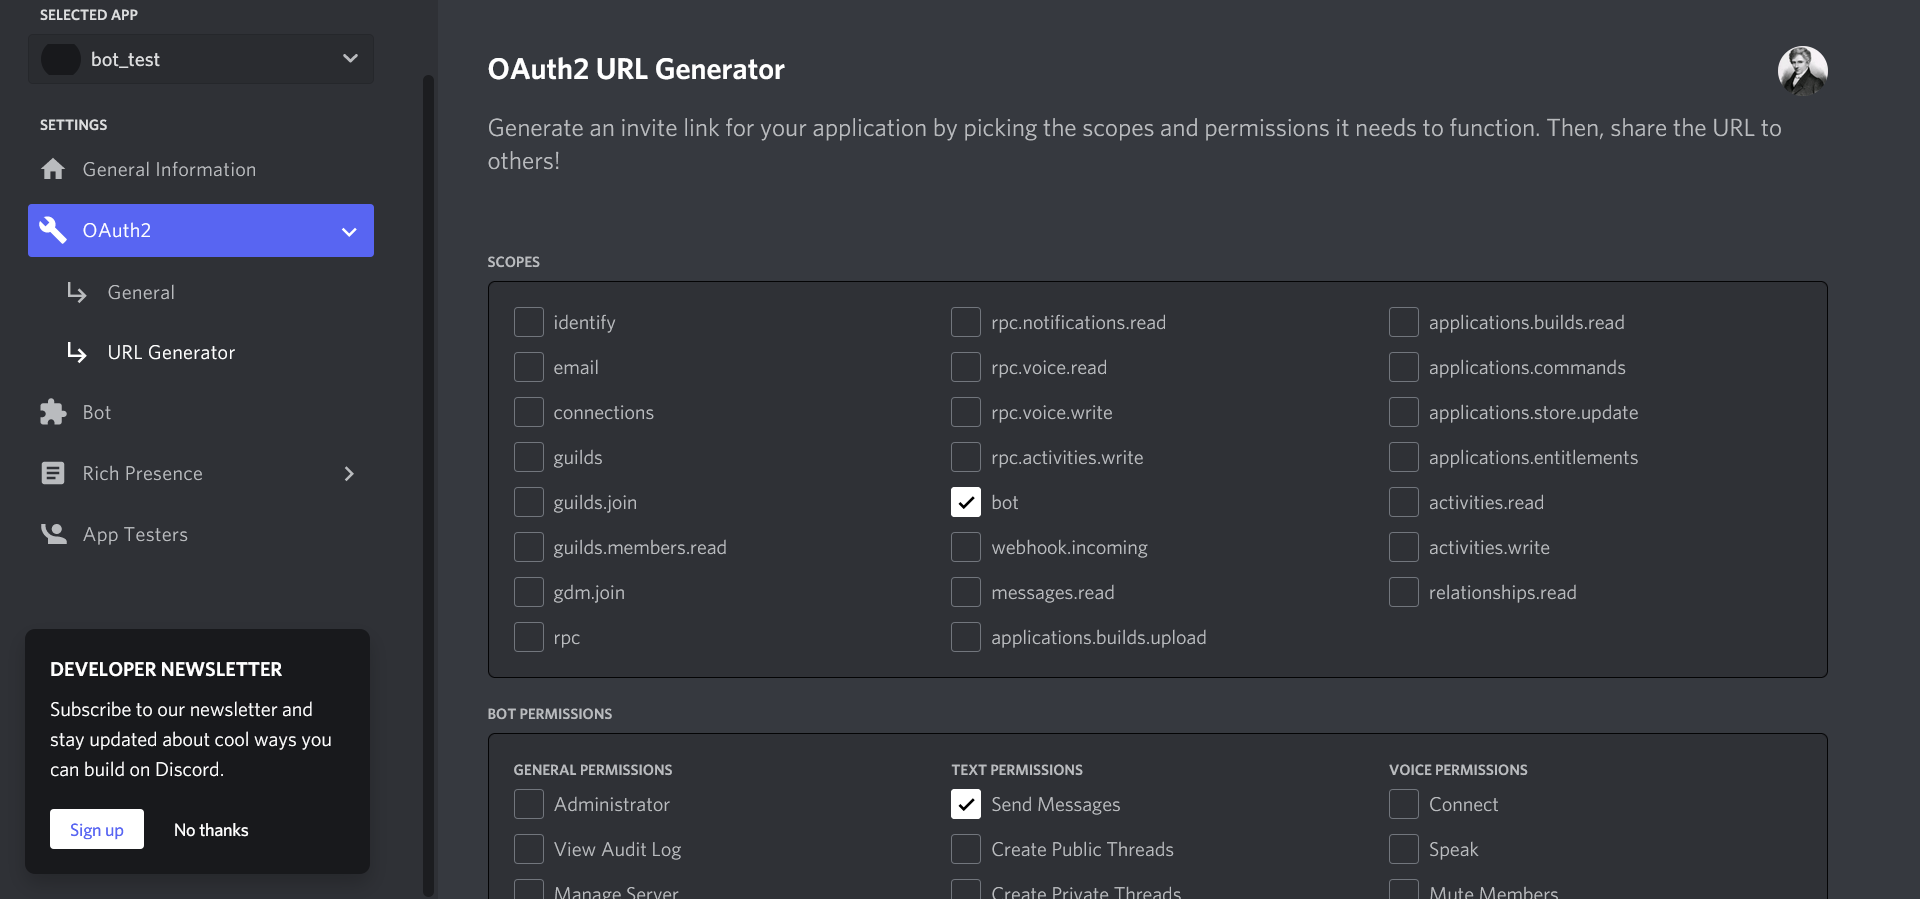
比如作为一个fb-bot可能只要选择这些就可以了。接着我们点这里的copy。吧URL复制到浏览器里面并点击。
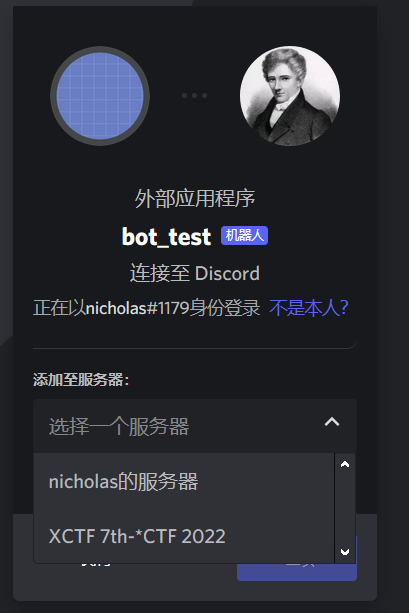
可以看到它让我们选择一个服务器。这个服务器就是我们作为管理员所在的服务器。
本地构建bot环境
这里需要介绍一些discord的API。以及一些需要安装的库。最好把下面这些都装了
1
2
3
4
5
6
7
8
9
| from aiohttp.client import request
import discord
from aiohttp_socks import ProxyConnector
from discord.ext import tasks, commands
from discord.ext.commands import Bot
from discord import utils
import requests
from requests import sessions
import json
|
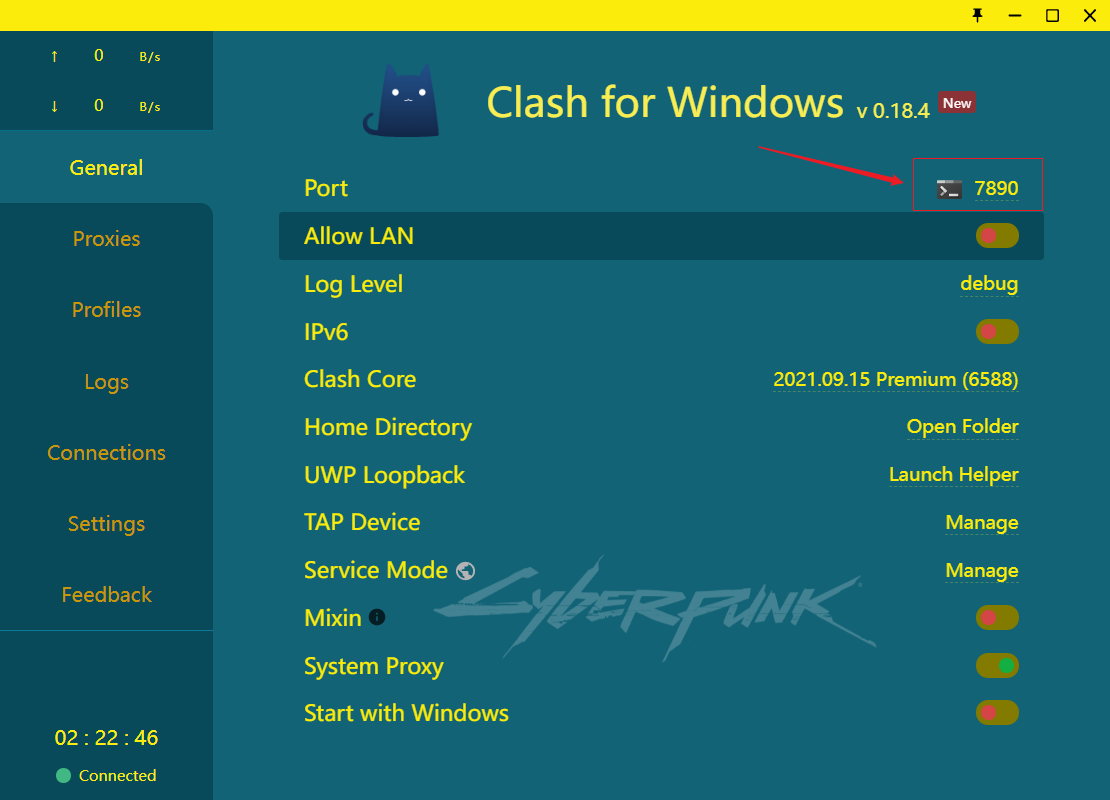
其次,需要一个VPN。我这里用的是clash。直接用他的默认端口7890就可以了。注意,clash默认打开的时候不会开启socks5端口。我们需要按照以下步骤操作:
- 打开clash
- 进入windows Internet属性这里,修改如下所示的套接字部分。这里要保持安全这里写空,不然不知道为什么xctf的SSL验证无法通过(真是糟心…)
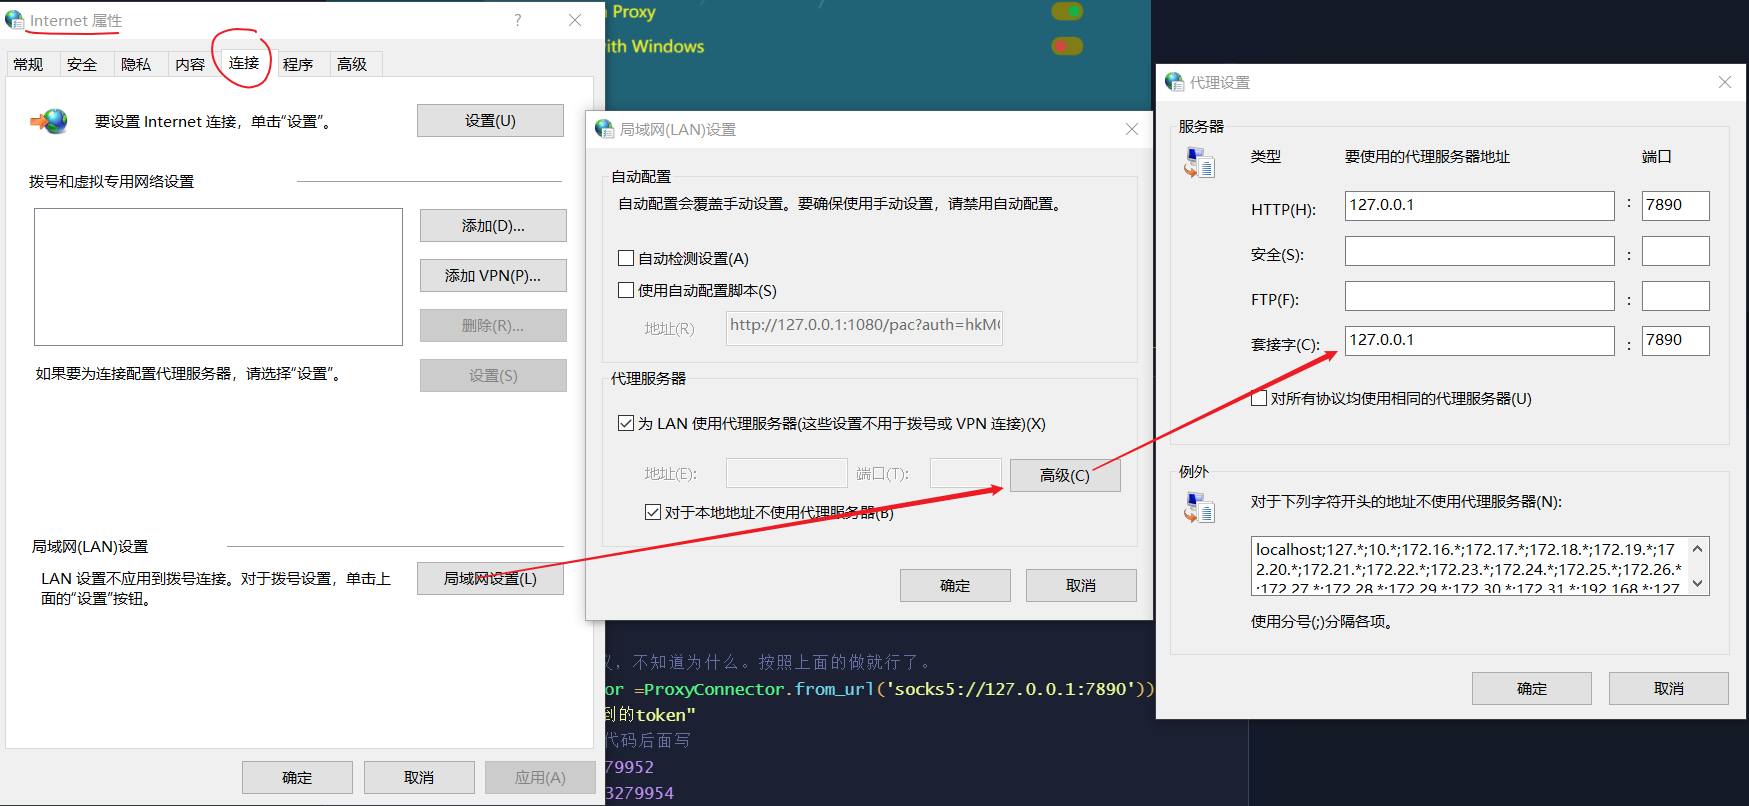
之后就可以了。注意不能把上面两步倒过来,因为clash打开的时候会默认重置上面我们添加的内容。
实现代码
1
2
3
4
5
6
7
8
9
10
11
12
13
14
15
16
17
18
19
20
21
22
23
24
25
26
27
28
29
30
31
32
33
34
35
36
37
38
39
40
41
42
43
44
45
46
47
48
49
50
51
52
53
54
55
56
57
58
59
60
61
62
63
64
65
66
67
68
69
70
71
72
| from aiohttp.client import request
import discord
from aiohttp_socks import ProxyConnector
from discord.ext import tasks, commands
from discord.ext.commands import Bot
from discord import utils
import requests
from requests import sessions
import json
bot = Bot("!", connector =ProxyConnector.from_url('socks5://127.0.0.1:7890'))
TOKEN = "上面基础知识拿到的token"
MY_GUILD=959118584083279952
MY_CHANNEL=959118584083279954
XCTF_GUILD=941157903128223805
XCTF_TEST_CHANNEL=941200329968603187
XCTF_REAL_CHANNEL=941198787580412005
@bot.event
async def on_ready():
print('We have logged in as {0.user}'.format(bot))
await bot.get_channel(XCTF_TEST_CHANNEL).send("Bot is online")
class MyCog(commands.Cog):
def __init__(self, bot, index):
self.index = index
self.bot = bot
self.first_blood.start()
def cog_unload(self):
self.first_blood.cancel()
@tasks.loop(seconds=60)
async def first_blood(self):
await self.bot.wait_until_ready()
print(self.index)
guild = self.bot.get_guild(XCTF_GUILD)
res = requests.get('https://adworld.xctf.org.cn/api/evts/notices', params={'evt': 171, 'id': self.index}, cookies={'session': '访问上述网页看到的session'})
res.encoding = 'Unicode'
result_text = res.text
json_data = json.loads(result_text)
for item in json_data:
if (item['is_task'] == 1):
name = 'main-chat'
if(item['id'] > self.index):
self.index = item['id']
await utils.get(guild.text_channels,name=name).send(item['notice'])
print(item)
@commands.command()
async def stop(self, ctx):
if ctx.channel.name == 'main-chat':
await ctx.send('Bye!')
await bot.close()
bot.add_cog(MyCog(bot, int(input('index: '))))
bot.run(TOKEN)
|
- 如何找到server guild可以参考下文。
https://poshbot.readthedocs.io/en/latest/guides/backends/setup-discord-backend/#find-your-guild-id-server-id
- 如何找到channel?连接的最后一个反斜杠后面的就是

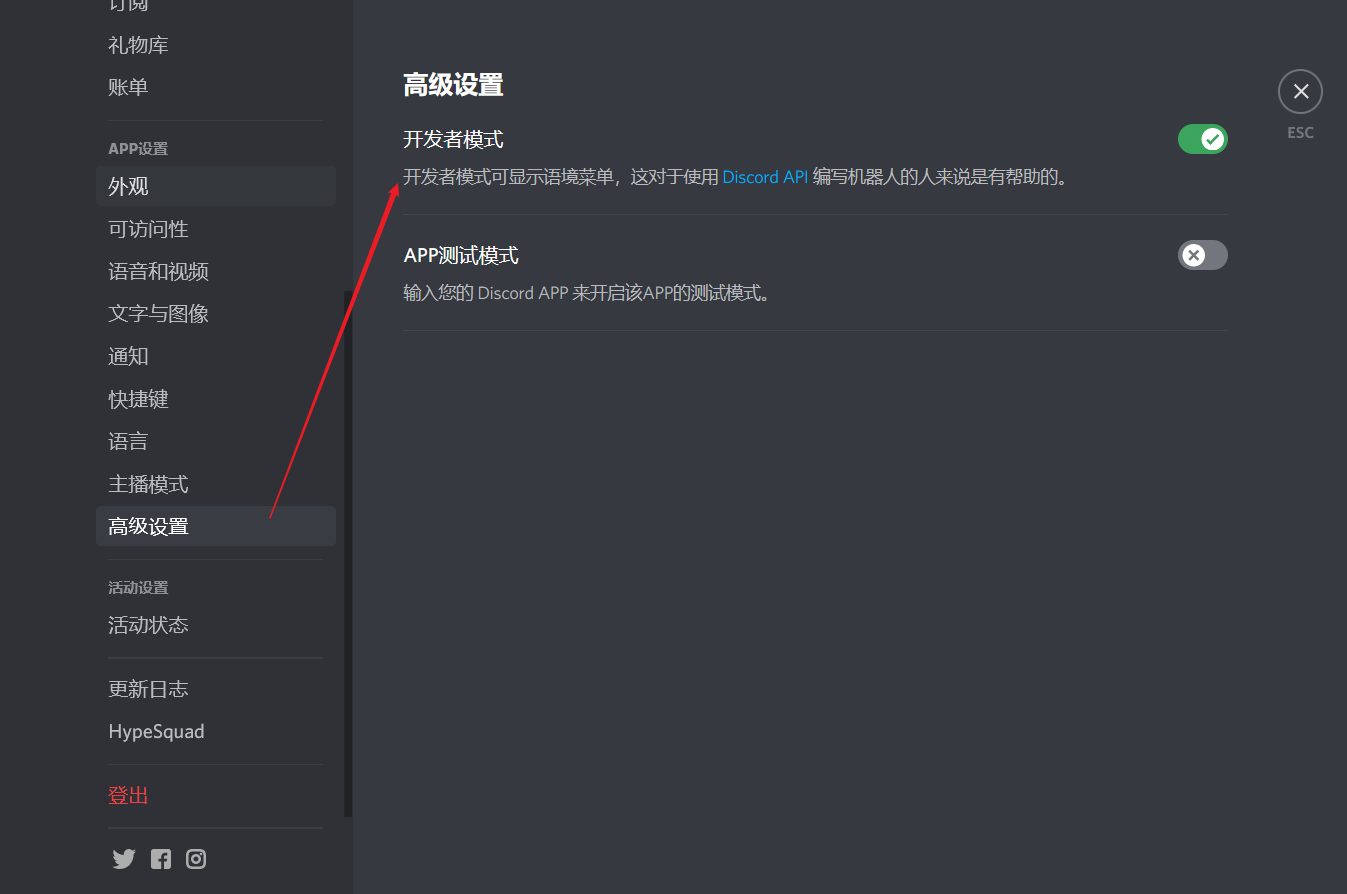
- 为什么json这样写,可以打开一个上面代码第44行的网站看一眼就知道了。
可以看到xctf发出的信息都是这种格式。注意is_task字段,这个区分了是announcement还是一血播报。我们只要根据这个,然后提取出notice就可以了。另外注意每次请求的URL里面的id是返回内容中最小的id。举个例子上面可以看到消息id最大是2271.那么如果请求id=2200就会显示2200到2271的所有消息。所以每一次请求完,要记录一下最新的ID,防止重复播报一血。这一点在代码56行体现。
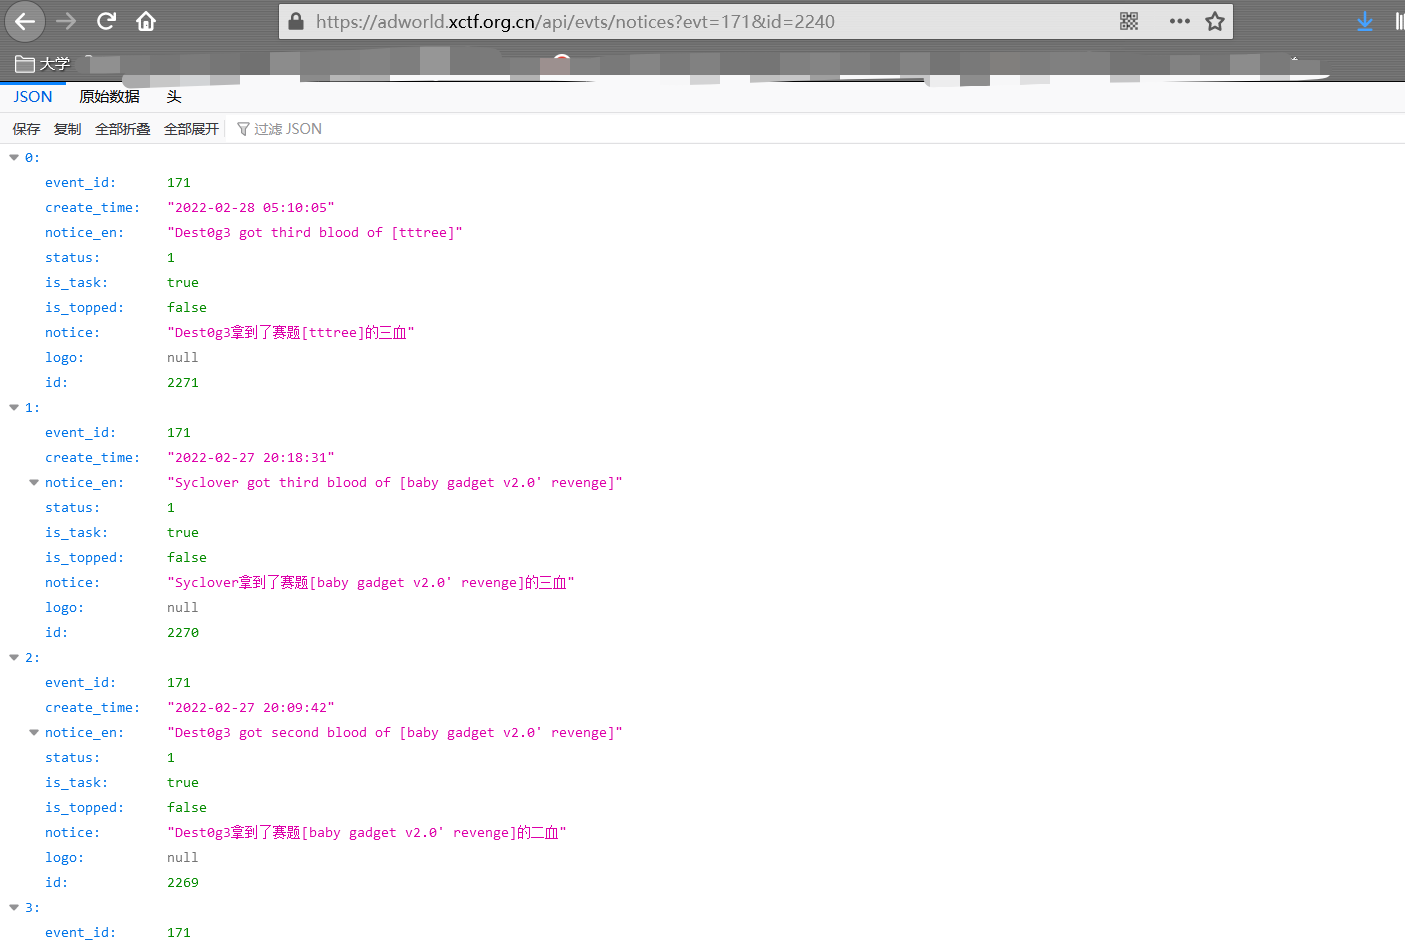
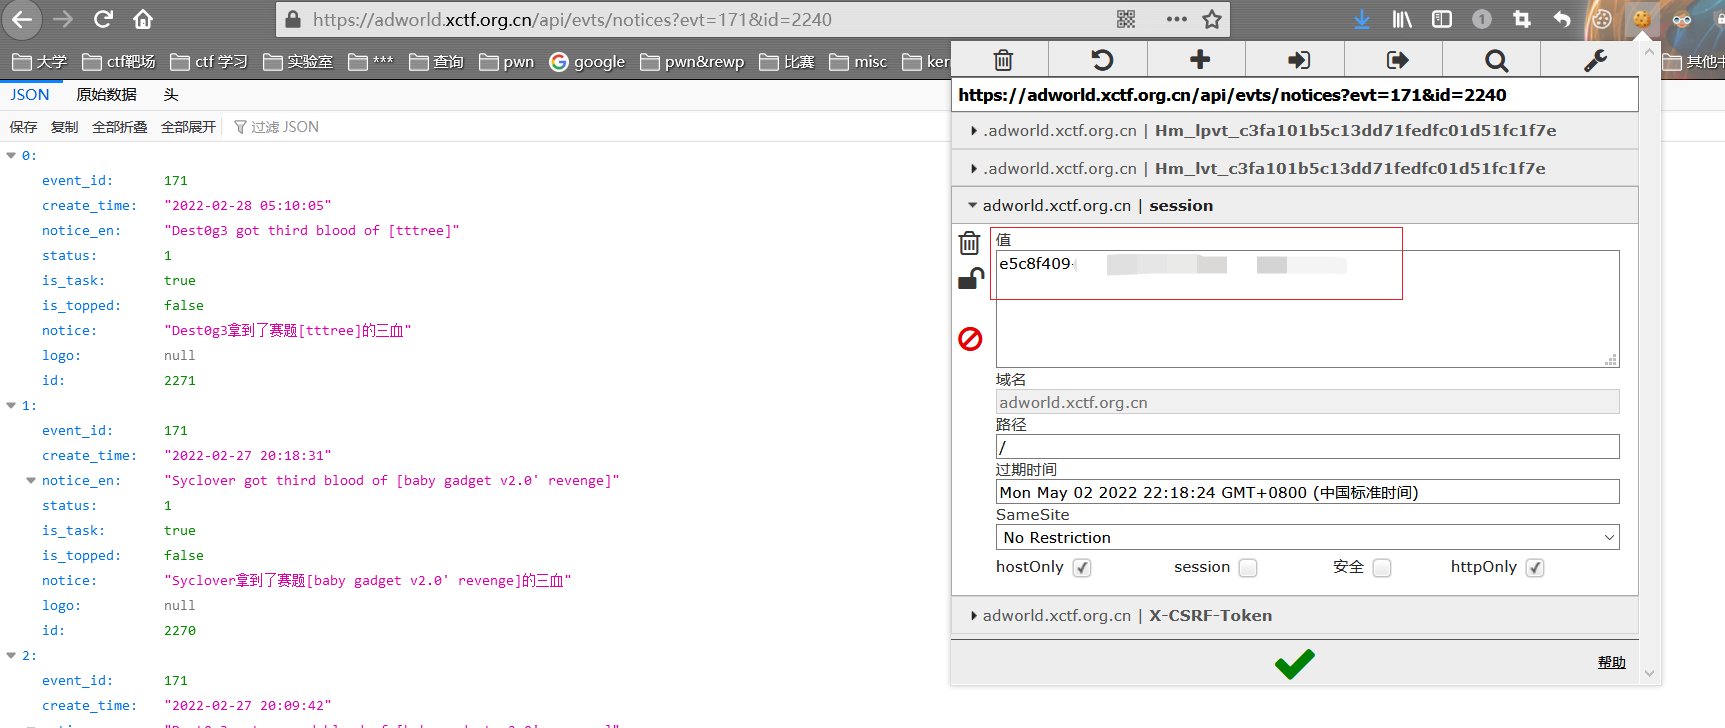
- session怎么看?
我安装了火狐插件EditThisCookie。可以直接在这里看到。
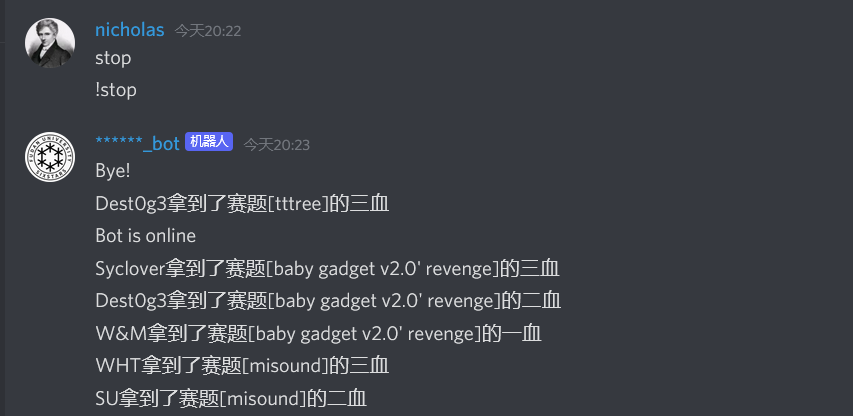
发个命令测试,都是没问题的
上述bot只是实现了最简单的一血播报。想不到还有什么好玩的命令了。